In previous posts we have seen how to develop a RESTful service using Spark and we have implemented a service to manage a blog. In this post we are going to create an HTML view of the blog, showing how the same data can be exposed through JSON (for consumption by other applications) and HTML (for the sake of our fellow human beings).
The code is available on GitHub: https://github.com/ftomassetti/BlogService_SparkExample.
The tutorial is written by Federico Tomassetti, you can read other posts from this author on his blog.
The code is available on GitHub: https://github.com/ftomassetti/BlogService_SparkExample.
The tutorial is written by Federico Tomassetti, you can read other posts from this author on his blog.
How to offer both JSON and HTML responses?
To offer the same data as JSON or HTML we could use different strategies. The two simplest ones are:
- using different endpoints for JSON and HTML
- use the Accept header to determine what format of data to return
The first strategy is very simple to implement: You just have to create different routes. For example, we could offer the JSON data in response to the endpoints /service/posts and /service/posts/:id while offering HTML data in response to the endpoints /posts and /posts/:id. This is because we typically want shorter URLs for the content intended for human beings. In this post we will focus on the Accept-header strategy though, which requires a bit of work.
Using the Accept header to decide to return JSON or HTML
An HTTP request reaching our service brings a lot of information, including the URL (of which we can parse specific parts to derive parameters), query parameters, a body and headers.
An interesting header is Accept. It can be used to specify the format that the caller is able to process or the formats it prefers. A web browser typically set this header to contains text/html. Other applications prefer to work with format like JSON or XML (for the young kids out there: XML is a weird markup thing we used to have before JSON).
The actual content of the header can be quite complex, for example, my browser sends:
text/html,application/xhtml+xml,application/xml;q=0.9,image/webp,*/*;q=0.8
This is a list of formats in the order in which they are preferred by the browser (see content negotiation for details).
Let's see how use the Accept header to decide when to return HTML from Spark (spoiler alert: it is easy!)
private static boolean shouldReturnHtml(Request request) {
    String accept = request.headers("Accept");
    return accept != null && accept.contains("text/html");
}

...where we define routes
// get all post (using HTTP get method)
get("/posts", (request, response) -> {
    if (shouldReturnHtml(request)) {
        // produce HTML
    } else {
        // produce JSON
    }
});
In this example we either get a request specifying text/html in the Accept header or we provide JSON in all other cases. It could make sense to return an error instead of producing always JSON: if someone is asking for XML it is not going to be able to process the JSON we are going to send him back.
Producing HTML programmatically using j2html
Let'see how we could generate HTML from Java. We are going to use j2html , a library from David Ã…se. David, among other things, is involved in the Spark project and redesigned the whole website (if you are interested in reading more about him have a look at this interview about his involvement in open-source).
Let's start by adding the dependency in our POM file:
<dependency>
    <groupId>com.j2html</groupId>
    <artifactId>j2html</artifactId>
    <version>0.5.0</version>
</dependency>
Now we can use j2html and some java 8 magic to take a lists of posts and transforming it in a page that we can render:
return body().with(
        h1("My wonderful blog"),
        div().with(
            model.getAllPosts().stream().map((p) ->
                    div().with(
                            h2(p.getTitle()),
                            p(p.getContent()),
                            ul().with(p.getCategories().stream().map((cat) ->
                                    li(cat))
                                    .collect(Collectors.toList()))))
            .collect(Collectors.toList()))
).render();
Let's take a look at what is happening here:
I think j2html is great when prototyping HTML pages because it avoids us the hassle of setup a template engine. In addition to that is very useful when you need to generate small pieces of HTML to be used to composed larger pages. However if you want to build complex layouts you may want to use templates to achieve a stronger separation between logic and presentation. In the next paragraph we take a look at templates.
The example using j2html is present in the GitHub repository under the tag j2html
- we start from the body of the page and we insert two elements in it: an header (h1) and a div which will contain all the posts
- we then take all the posts and map each post to the corresponding piece of html code
- each single post is map to a div which contains an header (h2) for the title a paragraph (p) for the content and a list (ul) for the categories
- each single category is simple mapped to an element of the list (li)
I think j2html is great when prototyping HTML pages because it avoids us the hassle of setup a template engine. In addition to that is very useful when you need to generate small pieces of HTML to be used to composed larger pages. However if you want to build complex layouts you may want to use templates to achieve a stronger separation between logic and presentation. In the next paragraph we take a look at templates.
The example using j2html is present in the GitHub repository under the tag j2html
Producing HTML: Using the FreeMarker template engine
For large HTML content you may want to use templates. The basic idea is the you can let a designer create a sample page and then replace the sample content with placeholders that are going to be dynamically replaced by the actual content at each request. Spark integrates well with a lot of template engines (see here for the complete list).
One thing that I like about FreeMarker is that it is quite flexible. For example we can use different strategies to find the templates. The two common approaches are:
The first strategy makes deployment easier: The package contains everything, including the templates. The second one allows for modifying the templates without having to re-package and redeploy the application.
I prefer the first option (at least when templates are reasonably stable) so we are going to see how we can store the templates as resource files.
Let's start by creating a file named posts.ftl under the directory src/main/resources. The template will not contain dynamic parts just this simple content:
One thing that I like about FreeMarker is that it is quite flexible. For example we can use different strategies to find the templates. The two common approaches are:
- pack the templates inside the application (as part of the jar/war produced and deployed)
- leave the templates outside the application
The first strategy makes deployment easier: The package contains everything, including the templates. The second one allows for modifying the templates without having to re-package and redeploy the application.
I prefer the first option (at least when templates are reasonably stable) so we are going to see how we can store the templates as resource files.
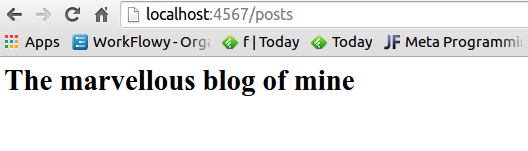
Let's start by creating a file named posts.ftl under the directory src/main/resources. The template will not contain dynamic parts just this simple content:
<html>
<head>
</head>
<body>
    <h1>The marvellous blog of mine</h1>
</body>
</html>
Now we have to configure FreeMarker to look for templates among the resource files. It is as simple as writing a few lines of code before you start define your routes:
        FreeMarkerEngine freeMarkerEngine = new FreeMarkerEngine();
        Configuration freeMarkerConfiguration = new Configuration();
        freeMarkerConfiguration.setTemplateLoader(new ClassTemplateLoader(BlogService.class, "/"));
        freeMarkerEngine.setConfiguration(freeMarkerConfiguration);
Now we have to specify which template to use for a specific route
// get all post (using HTTP get method)
get("/posts", (request, response) -> {
    if (shouldReturnHtml(request)) {
        response.status(200);
        response.type("text/html");
        Map attributes = new HashMap<>();
        attributes.put("posts", model.getAllPosts());
        return freeMarkerEngine.render(new ModelAndView(attributes, "posts.ftl"));
    } else {
        response.status(200);
        response.type("application/json");
        return dataToJson(model.getAllPosts());
    }
});
And this should be the result
How to pass data to the template
Cool, we are able to load and display a template but so far the template does not contain any dynamic content: it is just producing the same page whatever content we have in our blog. Let's correct this.
In the code to render the template we used a map:
Cool, we are able to load and display a template but so far the template does not contain any dynamic content: it is just producing the same page whatever content we have in our blog. Let's correct this.
In the code to render the template we used a map:
Map attributes = new HashMap<>();
attributes.put("posts", model.getAllPosts());

return freeMarkerEngine.render(new ModelAndView(attributes, "posts.ftl"));
This is the mechanism to pass data to the template. As you can see we are already passing a list of posts to the template, now let's see how to display them.
<#list posts as post>
    <div class="post">
        <h2>${post.title}</h2>
        <p>${post.content}</p>

        <h3>Categories:</h3>
        <ul class="categories">
            <#list post.categories as category>
                <li>${category}</li>
            </#list>
        </ul>
        <i>Published on the ${post.publishing_date}</i>
    </div>
</#list>
- we start by iterating on the posts (posts is a key in the map we passed to the FreeMarker enginer, so we can access it here)
- for each post we display title, content and publishing_date
- we iterate on the categories of the single post and display them

The example using FreeMarker is present in the GitHub repository under the tag freemarker
Conclusions
As we have seen in this post Spark can be easily integrated with template engines and FreeMarker is a decent choice. I personally think that Spark is great for RESTful services but it does a pretty good job also for common user-facing web applications and it can be easily used for mixed applications (RESTful service + HTML interface, as we have seen in this post).
There are improvements to be done to use templates in a large application. For example you may want to define a common structure (header, navigation column, footer) to be used in all the different templates, without having to maintain copies. To understand how to do this and more advanced topics I suggest to take a look at the FreeMarker documentation but feel free to write a comment here or use the Spark forum.
About the author: Hi, I am Federico Tomassetti, I hope this tutorial was helpful for you. On my blog I write also about many other topics. You can read it at: http://tomassetti.me
